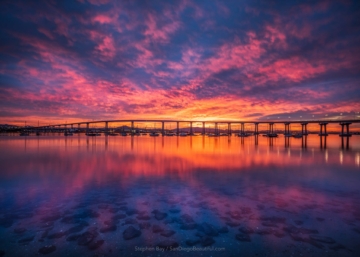
Photo by Cheryl Herrera, featured in Nightscapes Exhibit
Light Painting by Eric Pare ericpare.com, www.facebook.com/groups/ericpare
Model: Kim Henry www.instagram.com/kimhenry.dance
Below is some general information about light painting – equipment and tips!
Recommended Equipment:
- DSLR or Mirrorless Camera capable of Bulb setting
- Tripod – sturdy one to prevent camera shake
- Cable release or remote trigger to prevent shake and control desired exposure time
- Lens hood to block unwanted light
- Light source for painting
Other Useful Extras:
- Penlight, small flashlight, or headlamp to help make camera adjustments. Red light penlights are useful and are less likely to interfere with other photographers.
- Flashlight(s) for light painting, both strobes and continuous light sources.
- Colored light sources (wands, fiber optics, poi balls, Christmas lights, cell phone, etc.)
- Black mask, umbrellas, stencil boxes
- Reflective plastics, foil, side mirrors
- Dark clothing (easier to clone out if you are in front of a camera)
- Stop watch
Initial Settings—A Good Place to Start: ISO 100 f/14 Bulb mode for exposures over 30 sec WB at tungsten or incandescent
Recommended Tips:
- Shoot in RAW format
- Shut off image stabilization (IS, image stabilization or VR, vibration stabilization) when using a tripod. If on, it can fool your camera and actually cause blur.
- Turn off long exposure noise reduction (NR)—a low ISO is enough, and having this off shortens the complete time needed for a shot.
- Lower the brightness of the LCD preview for better determination of exposures.
- Use your histogram to judge exposure (if curve too far left, it’s underexposed).
- Choose your aperture– f/8 or 10 if light source is less bright. The brighter the light source, the lower the aperture needed (e.g., f/10-F/18). Higher f stops give cleaner light lines. Lower, wider apertures (f/5.6 and f/7.1) limit the exposure time.
- Set White Balance (WB)- White balance can be changed in camera and/or in post processing. Tungsten cools down colors and helps balance white light from a flashlight. Creative changes to WB can be done in post processing. Colors of the light source can be changed and multiple images can be creatively layered.
- Focus- Focusing can be difficult at night or in a dark studio. If using manual, use a flashlight on the part of the object you want most in focus (e.g., eyes in the face). Then, don’t touch the focus ring. If you use autofocus, focus then lock it or switch back to manual without moving it. Back button focusing also works well.
- Use Manual or Bulb mode exposure setting. For exposures longer than 30 sec, you must set the exposure in bulb mode (either located right after 30 seconds or on some cameras, on top of the camera there’s a B option on the mode dial). • Set ISO – Unless you’re shooting the moon or stars and need a higher ISO, it’s best to go as low as possible for light painting. This will minimize noise and increase exposure time.
- Plan your shot before taking it. Choreograph movements of the subject and light. Frame your shot to get the best composition.
- Don’t always shoot from the same angle. Try unique vantage points while shooting.
- Take a base exposure shot first and be prepared to shoot the same scene repeatedly to optimize settings.
- Be careful! If you are in front of the camera and do not want to be detected, do not stand in one position for long or you will produce a ghost image (even in dark clothing). Ghost images also happen if you stand between the light source and your camera. Either keep directly behind your model while moving the light, or keep moving to prevent ghost images.
- Models must remain perfectly still to avoid blur.
- Avoid overexposure. Don’t shine your light directly back at the camera. It causes harsh light spots (lens flare).
- Keep lights moving all the time during the shot to prevent harsh light spots or lines.
- Paint from side-to-side and up-and-down (just like painting) to achieve the best 3D look, rather than directing lights held from behind your camera. For portrait painting, a fiber optic brush can be used, just make sure your model sits as still as possible and closes their eyes if you brush their face.
- Use penlights to write words. Remember, write backwards for the camera!
- Create light tunnels. Vortex light patterns can be created by slowly zooming in or out while taking a long exposure.
- Create dramatic mirror images by having the model stand at the edge of a calm lake, in a shallow puddle, or next to a reflective surface.
- Shoot time lapse videos of light painting and overlay frames using Adobe Premiere (see tutorial under Additional Resources below).
- Learn when/how to break the rules—e.g., purposeful flaring by flashing quick bursts of the light at the camera, having model make small controlled movements throughout the exposure, etc.
Troubleshooting:
- Too dark or light? Adjust exposure time or aperture.
- If light needs to be more focused on an area, narrow the beam.
- If light needs to be more even, use a wider beam.
Additional Resources: Painting with Light: Lighting & Photoshop Techniques for Photographers by Eric Curry available in paperback and for Kindle. A series of light painting tutorials by Eric Paré: https://www.pinterest.com/ericparephoto/lightpainting-by-eric-par%C3%A9/?lp=true
Digital Photography School: Bruce Wunderlich’s Beginner’s Guide to Light Painting: https://digital-photography-school.com/beginners-guide-to-light-painting/
Light Painting Tutorials Using Light Brushes: https://lightpaintingbrushes.com/pages/light-painting-tutorials
The Strobist: https://strobist.blogspot.com/2012/11/winter-reads-painting-with-light.html
Cinematography- How to create light-painting trails using Adobe Premiere – Eric Paré / Xangle: https://www.youtube.com/watch?v=RUaNsknMxw8
