Photo by Stephen Bay
For some of our Light Chasers exhibits, we recommend printing your photos on metal (dye-sublimation). Here is an FAQ to get you started with your print.
I understand there are some questions about printing on metal for the exhibit. So I’m going to try and answer them in this post.
WHAT IS A METAL PRINT?
There are actually several different media referred to as a metal print. The one that we are recommending for the Latchkey Brewery exhibit is what is known as dye-sublimation on aluminum. In this process, your image is first printed on a transfer paper. The paper is then put on top of a sheet of coated aluminum and stuck in a heat press at about 400F. The inks then become infused into the metal. Most labs then put a frame or gatorboard on the back of the metal so that the print is ready to hang and it will appear to float off the wall.
- A paper print made on metallic paper. This is a regular paper print, although it has a unique shimmery appearance, and needs to be framed/mounted
- Direct printing onto a metal surface with inks. The inks are then cured with ultraviolet light (often called UV direct).
- Printing onto a photo paper which is then glued to a metal sheet (usually dibond). The surface is then sealed with a protective coating.
If you read through the descriptions on the lab you use, you can usually figure out which process they are using.
WHAT IS CHROMALUXE?
There are a few different manufacturers of the aluminum panels used in metal printing. For the best quality, you’ll want to find a lab that uses ChromaLuxe panels.
WHAT SURFACE SHOULD I CHOOSE?
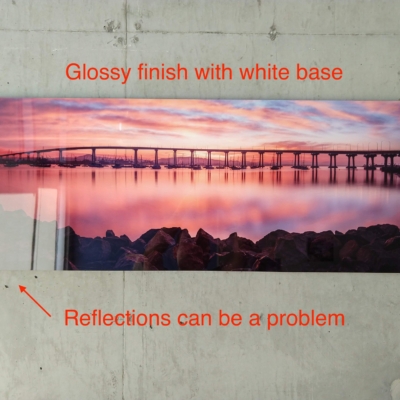
For dye-sub prints, most labs will give you several options in terms of the finish. First is the base coating on the aluminum sheet. This can be either white or clear (sometimes called sheer). Generally I recommend you get the white finish. The clear finish allows the bare metal to show through where the image is white. It’s a very cool effect but it doesn’t work for all photos. Unless you’ve seen the clear finish in person before and know that you absolutely want it, I would avoid it.
WHAT TYPE OF CORNERS SHOULD I CHOOSE?
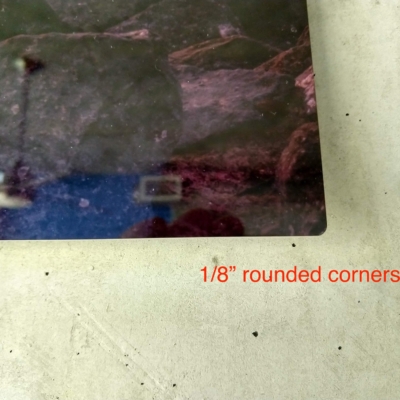
Most labs will give you a choice between sharp rectangular corners and rounded corners. Choose rounded corners for safety.
WHAT HANGING MOUNT SHOULD I USE?
Labs will often give you a variety of hanging options. These could be
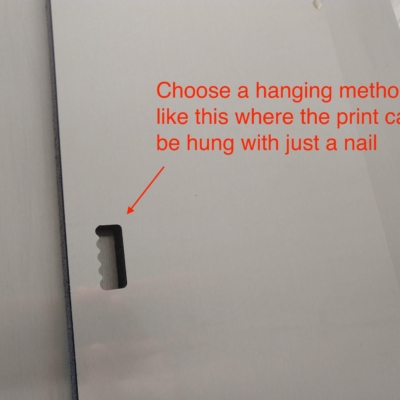
- a hole in the float mount for a nail
- a picture frame on the back with a wire for hanging
- a french cleat mount on the back
If possible, choose method 1 or 2 for simplicity. This will make it easiest for us to hang the exhibit. For a permanent installation, the French cleat is the most secure.
HOW DO I PREPARE MY FILE?
Read through the lab’s FAQ on file preparation and submit in the format they recommend. Usually that means either a jpeg or tiff file in sRGB or adobeRGB color space. For resolution, anything over 150ppi should look fine.
You should perform output sharpening on your files. Usually I just use the export option from lightroom and choose “standard” and either glossy or matte depending on the surface.
The main gotcha with metal printing (and using a lab in general) is that the prints may come out too dark. If you don’t have a calibrated monitor and proper viewing environment, I’d recommend printing a few test images on paper and send these to a lab (it doesn’t have to be the same one) with no autocorrection. Check your prints for brightness and colors and adjust your file appropriately.
Some labs will offer metal proof prints at a nominal cost. I’d recommend this especially if you are doing a large metal print for the first time with a lab.
LABS FOR PRINTING
As far as I know there are no local labs that do dye-sublimation in San Diego. The closest local area labs would be
- Spirit Printing (Chula Vista – mention Latchkey to get 15% discount)
- Art Beat (Irvine)
- Metallography (Temecula)
- Shiny Prints (Florida)
- Metal Mouth Prints (KS)
- BayPhoto (Norcal)
- Image Wizards
- White Wall
- Reed Photo
- White House Custom Color
- Aluminyze
Many labs have a substantial first time ordering discount and/or a discount for those who resell their prints.
There are also various discount labs that do metal printing. I don’t know all of them but the only one I would try would be Costco due to the ease of return policy. Costco outsources their metal printing but unfortunately they do not use ChromaLuxe blanks.
HOW LONG WILL IT TAKE TO MAKE A METAL PRINT?
Many labs publish this information on their website but if you can’t find it, contact their support and ask directly. Some, like Bayphoto, are extremely fast and will ship a metal print within 2-3 days. Others may take as long as 2 weeks.
HOW DO I SIGN A METAL PRINT?
I use a DecoColor paint marker with an extra fine tip. Make sure to allow enough time for the paint to dry before touching the surface. I switch between silver and black markers depending on the image.


